
How To Clean a Stand Mixer: A Step-by-Step Guide
If you’re like most home cooks, you rely on your stand mixer to make everything from cakes to bread. And while it’s hard to imagine life without one, these hardworking kitchen appliances require regular maintenance and cleaning. Without proper care, your once dependable stand mixer can become a nightmare to use and can even affect the taste of your baked goods.
That’s why, in this post, we’re exploring how to clean a stand mixer in a few easy steps. We’ll discuss what materials you need, go over the basic maintenance steps and look at some effective deep-cleaning methods. Everything you need to keep your stand mixer running like new is here!
Why you should clean your stand mixer
Just like with any other kitchen appliance, cleaning your stand mixer regularly is essential for two primary reasons: lifespan and safety. Regular cleaning of your stand mixer can help increase the overall lifespan of the machine by preventing any dust that builds up over time from entering the motor base, which could cause major damage or malfunctioning of parts. Additionally, consistently cleaning the bowl and stand mixer attachments will help maintain the safety of your food preparation environment by preventing the spread of bacteria that could occur if left uncleaned over time.
How to disassemble and clean your stand mixer
The first step in cleaning your stand mixer is to disassemble the parts. Begin by unplugging the stand mixer from its power source, then proceed to remove the bowl, beaters, dough hooks or other stand mixer attachments. Place all removable components onto a clean and dry countertop that has been wiped down with an antibacterial wipe or cleaner prior to beginning the process.
Once disassembled, all stand mixer attachments should be washed with warm water and mild dish soap to remove any residue that may have built up over time from use. Scrub their surfaces with a kitchen sponge or cloth when washing as metal scrubbers may scratch the nonstick surface of some attachments. After each attachment has been washed and rinsed off, make sure to dry it thoroughly with a clean cloth.
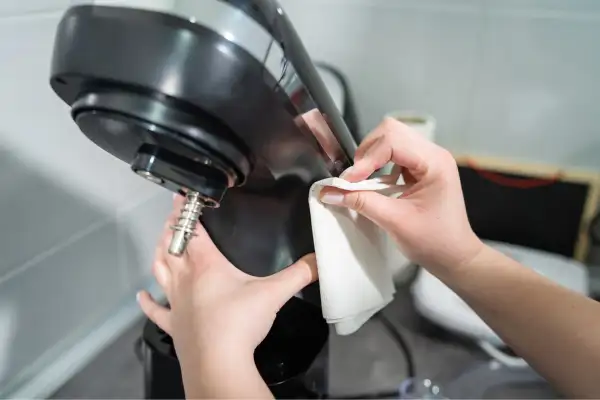
How to clean the motor base
When it comes to cleaning the motor base of your stand mixer, it’s important not to submerge it in water, as this could lead to electrical malfunctions or even fires in severe cases. Instead, use an antibacterial wipe or damp cloth moistened with warm water to gently wipe away any dust and debris on the outside surface of your stand mixer’s motor base. Once you’ve finished wiping down the motor base with a damp cloth, buff it with a dry cloth or towel.
Final steps for putting everything back together
Once you’ve dried all the removable components thoroughly and buffed the base with a clean cloth or towel, you can begin reassembling your stand mixer. Carefully insert each attachable piece into its designated slot on top of the motor base before pushing down until it clicks securely into place. After you’ve re-assembled your stand mixer, store it until it’s time for your next recipe.
Conclusion
Performing frequent cleanings of your stand mixer’s components can help ensure that it operates safely and efficiently each time you need it. Simply follow these steps to have a clean appliance ready for safe use each time you feel like baking a treat or doing less manual labor while cooking dinner!